

The outdoor dust and pollution can be detrimental for your skin, and you have to provide it cleansing every other day, but going to a parlor to get the treatment done can be an expensive affair, so what to do? Give yourself a deep cleansing facial at home, of course!
What are the steps to follow for a deep cleansing facial? What will the materials required be? How much time will it take? If these are the questions running through your head, worry not because we have answers for them!
We shall guide you through all the steps of a deep cleansing facial while also giving you some methods to prepare the skincare products at home to give you a truly DIY experience! So let’s dive right into it!
Steps to follow for a Deep cleansing facial
A deep cleansing will take you about an hour. We recommend you not perform any other activity at that time and enjoy a completely relaxed environment! Let’s look at the steps to follow to give your skin the care it deserves!
Firstly we are in for at least an hour of relaxation so you can start with-
1. Setting up a soothing environment
This one will not be hard; set up your room to the tunes of a spa, light some candles with relaxing scents, and play some soothing music.
Now that the scene is set get into the bath to relax your body. If you are not in the mood for a full-on bath, a feet soak will work just fine! You can also add Epsom salt and a few drops of essential oil to your bath water to make it even more relaxing.
Now that you have relaxed your body let’s get into the face care!
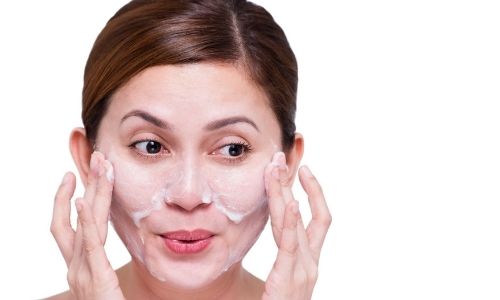
2. Cleanse your skin
To prepare your skin for all the goodness of a deep cleansing facial, you need to first cleanse it. Cleansing will help remove all the residue makeup, pollutants, excessive oils, and dirt from your skin.
You can use your regular face cleanser to do this, but if you want to have a complete DIY experience, you can create a face cleanser at home by –
- Taking two tablespoons of apple juice, two tablespoons of honey, and six tablespoons of whole milk
- Mix all the ingredients in a clean bowl, and you have a DIY face cleanser!
Apply the cleanser to your face and massage it in circular motions using your fingertips. After three to four minutes, wash it off using water and pat dry your skin.
While a single cleanser will be enough, you can also try double cleansing – for double cleansing, first start with using an oil-based cleanser to clear out all the makeup and dirt and then follow it with a cream or gel-based cleanser to nourish your face and prevent dryness.
3. Steam your face

The next step after cleansing your skin is to steam it. Why steam, you ask? Steaming helps open up the pores of your face and soften the skin, so in the next step, you will be able to exfoliate your skin more easily and effectively!
How to steam?
- Take a bowl of water and boil it on a stove
- After you see steam coming out, carefully take the bowl off the stove using gloves and keep it on a flat surface.
- You can add a bag of green tea or some essential oils to the water (this step is optional)
- Now place your face above the hot water and let your skin come in contact with the steam.
- Cover your head with a clean cloth to create a canopy over the bowl and yourself to prevent the steam from escaping.
- Do this for 5-6 minutes, and let the steam work its magic on your face.
After steaming gently, pat dry your face using a towel and –
4. Exfoliate your skin
Exfoliation is an essential step while giving yourself a deep cleansing facial. Exfoliating helps remove the dead skin cells from your face and remove the oil collected on your skin. Exfoliating also helps unclog the pores of your face hence reducing acne breakouts and helping you get a natural glow!
You can use a face scrub for exfoliating, readily available in the market. While choosing a commercial face scrub, make sure to look that it mentions exfoliating in the packaging.
You can also prepare homemade face scrubs! One method of doing it is-
- Take one ripe banana, ¼ cup brown sugar, a tablespoon lemon juice, and one teaspoon Vitamin E.
Note that the sugar is the exfoliating agent over here; while preparing a face scrub using other ingredients, always add an exfoliating agent like sugar, oatmeal, etc.
- Blend the banana and put it into a clean bowl
- Now add the other ingredients to the bowl and mix them thoroughly.
Now that you have a face scrub at hand, gently rub it on your face using circular motions, concentrate more on places with high sebum production, like your T-zone(forehead, nose, and chin).
Pay attention that you cover your whole face, and dont miss out on places like your upper lips and under your eyes (be more gentle while massaging under your eyes; that area tends to be sensitive).
Do this for 2-3 minutes and then wash off the face scrub using water; gently pat your skin dry using a towel.
Remember – Make sure you don’t go all kamikaze while massaging the face scrub, as massaging your skin harshly might lead to breaking of skin cells and cause irritation rather than giving you a glow.
5. Apply a face mask

Now is the time to apply a face mask onto your face to help further cleanse the pores and hydrate them. Masks are an essential step to help keep your skin moisturized and detoxify it to help it glow!
You can use different types of face maks to target different issues that you are facing currently –
- If you dont have any specific issues, you can go for a – gel mask or a sheet mask which will help you hydrate your skin.
- For dry skin, go for a cream mask that will help maintain your skin’s hydration and reduce dryness.
- For acne-prone/oily skin – go for a clay mask, one with vitamin c or sulfur, as these will help unclog your pores, reduce the oiliness and prevent acne.
For the DIY mask, you can-
- For dry skin- take ⅓ cup of cocoa powder, ½ cup of hone, and three tablespoons of mashed oats. Mix this in a clean bowl, and it’s ready to be applied!
- For oily skin- replace the cocoa powder with ½ cup of pureed raspberries in the above method, and you will have your DIY mask ready!
Apply the mask evenly on your whole face, leaving your eyes and lips. Leave the mask on for 15 – 20 minutes .you can put on a slice of cucumber over each of your eyes and take a relaxing nap while doing this.
5. Apply serums

Now that your skin has been cleansed, exfoliated, and gone through that calming mask, it’s time to treat it to the goodness of serums. It will get absorbed easily at this stage, leading to more effectiveness.
Apply serums according to your specific skin type or skin conditions. You can follow-
- To smooth out fine lines and reduce wrinkles – go for a serum with retinol or bakuchiol
- For oil, skin go for hyaluronic acid serum
- For skin prone to breakouts, choose a serum with Salicylic Acid
- For pigmentation issues, go for a Vitamin C Serum.
6. Moisturize your skin
The last step in your deep cleansing facial is moisturizing to help hydrate the skin and lock away all the goodness that it has gained through the whole process. choose a thick moisturizer to replenish the hydration your skin might have lost during the deep cleansing
Apply generous amounts of moisturizer to your face and neck and massage it in. You can use a face roller while applying moisturizer to help spread it out evenly on your face and help increase blood circulation.
FAQs
1. Should I remove blackheads on my own?
No, it would be best if you did not squeeze out blackheads on your own, as it can lead to injuries, infections, and scarring. Refer to a specialist to do so.
2. How frequently should I perform a deep cleansing facial?
Every four to six weeks will be a good frequency, but it depends on your face type and needs. Choose a frequency that best suits your skin.
You May Also Like To Read:
Best Face Wash for Dry Skin in India
Best Anti Aging Serum in India
Conclusion
Deep cleansing facials can be an excellent way to relax while caring for your skin. With this article, you now know the steps to follow while deep cleansing at home, the benefits the different steps provide to your skin, and also some DIY methods to make your own skincare products at home!
Let us know in the comments which method you found the most useful!
