
We all love to try new skincare products and DIY—don’t we? Our face is vital as it reflects beauty and confidence in us; therefore, it is essential to keep it glowing and beautiful. A facial is one way to do it all!
The facial helps make your skin brighter, smoother and removes all the impurities with blackheads. One can quickly get facial done in beauty parlors by professionals. But do you really need professionals for just doing facials?
Doing facial at home helps you save money and maintain the health of the skin on the face regularly. Also, you don’t have to buy any facial products! It is possible to do facial with natural ingredients for chemical-free skincare.
This article will provide you the step-by-step process of doing a facial at home with natural ingredients. But before that, let’s start with what is facial and its benefits.
What is the Facial and Benefits of Getting it?
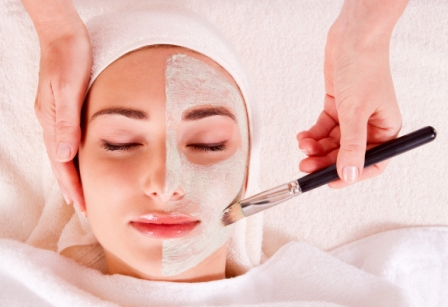
A facial is a skincare treatment that involves cleansing, exfoliating, steam, lotions, and so on, followed by a massage. It helps to provide many benefits such as
- Deep Cleanse: Since we use scrubs in facial, it helps cleanse the face and remove most impurities such as blackheads, toxins, and bacteria.
- Hydrates the Skin: Facials help hydrate the skin, especially at home, with natural ingredients. Hydration helps increase the moisture in the face, and you get relief from dry and dull skin.
- Improves Blood Circulation: As facial gets followed by massage, it helps in blood circulation and better oxygen flow, resulting in a glowing face.
- Results in reducing stress: Whole facial procedure is very relaxing, and it helps keep your mind calm and reduces stress and tension.
- Exfoliates Gently: Facial helps to remove dead cells from the skin’s surface effectively. It increases your skin’s softness and smoothness.
So, overall, facial is essential for your face skin, but as the process is not complicated, you can easily do a facial at home. There is no need to waste money and go to beauty parlors.
Now, why should you use natural ingredients instead of a facial kit to do facial arises?
Why should we go with Natural Ingredients?
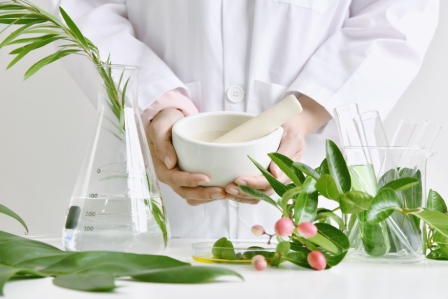
Facial kits available in the market claim to be natural; however, most have chemicals added. Here are some benefits of doing facial with natural ingredients.
- Instant Results: Facial with natural ingredients gives instant results, i.e., glowing skin after one use only.
- Chemical-Free: If we do facial with natural ingredients, it reduces the risk of a chemical reaction. But natural ingredients are primarily suitable for most skin types. The products with harsh chemicals damage your skin, and they are not ideal for everyone.
- Convenient and less expensive: Facial with natural ingredients is easy to get at home, and you don’t have to go to the market to get it and waste money. Also, you don’t have to waste time selecting the correct products.
Now, let’s start with the procedure of doing a facial at home.
How to Do Facial at Home—Step by Step Tutorial with Natural Ingredients
Facial at home is the same as facial in parlors. You have to follow the step-by-step procedure to do a facial at home. Let’s get started.
Step 1: Tie your hair
Before starting a facial, you should tie your hair into a bun or ponytail and if you have short hair, use a hairband. It is essential so that your hair doesn’t make contact with your skin while doing facial.
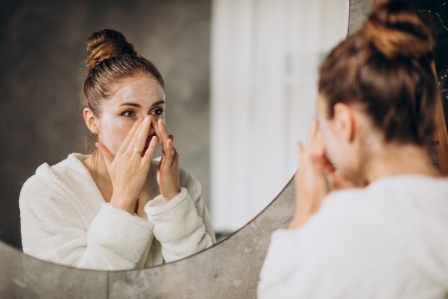
Step 2: Remove all Makeup
The very first step is to remove all the makeup from the face. You can use makeup remover, or you can use plain milk. Plain milk can remove all the makeup, but if you don’t want to use simple milk, go for unrefined coconut oil.
Dip cotton into the oil or milk and squeeze the excess oil or milk; remove all the makeup with the cotton.
Step 3: Cleanse your Face
The next step is to cleanse your face. Cleansing is essential to remove impurities from your skin. Wash your face with lukewarm water and use a face cleanser. You can either choose a mild face cleanser from the market or go DIY.
To make a DIY face cleanser, you can mix honey, liquid Castile soap, and few drops of any essential oil.
Step 4: Steam
The next step is to steam your face with neem. Neem has antibacterial properties that help open up pores and make it easy for you to remove blackheads. To take face steam, bring water and neem leaves and boil them at high flames.
Now take steam as you take when you have a cold. We suggest you steam till the water loses its heat.
Step 5: Scrub
The next step is scrubbing your face with face scrubs gently. We suggest you either mix a tbsp. Of rice flour with orange juice, or mix coconut oil with brown sugar until sugar dissolves. It helps to remove all the blackheads and whiteheads effectively.
Massage the scrub all your face but concentrate in the areas with most blackheads and whiteheads, i.e., around the nose. Also, massage very gently for 2 to 3 minutes, and after scrubbing, wash your face and wipe with a soft towel gently.
Step 6: Massage your Face
After using the scrub, the most crucial step is to massage your face very gently upwardly. To massage your face, you can use aloe vera homemade cream. You can mix aloe vera gel with rosewater or with egg white to make aloe vera cream.
Before massaging, dip your hands in cold water; it helps close the pores and massage your neck as well. We suggest you massage for at least 5 to 8 minutes.
Step 7: Apply a Face Mask
After doing a massage, wash your face and let it dry. It’s time to apply a face mask that you can easily make with natural ingredients.
To make a face mask, mix 1 tbsp. Of Multani mitti and ½ tbsp. Of turmeric powder. If you have oily skin, then add rose water and if your skin has a combination of dry and oily texture, then add rice water.
Alternatively, Mix 3 tbsp. Of honey and some milk into a bowl. Then add 1 tbsp. Of white sugar, you can also add rose water.
We suggest you apply a face mask and leave it for 15-20 minutes. Then wash it off and wipe your face with a clean and soft towel.
That’s it! It is easy, right? You can easily do a facial at home with natural ingredients without wasting money and time in parlors.
Conclusion
Facial is essential part of skincare routine; you should do facial at least 2-3 times a month. It helps to remove impurities from the face and provides you glowing and smoothing skin. With all the above-given steps, you can easily do a facial at home.
In the article, we have suggested few natural ingredients, but that’s not it! Numerous natural ingredients can be used while doing facial.
How do you do your facial—at home or in a parlor? Please share your experiences regarding facial in the comment box below.
