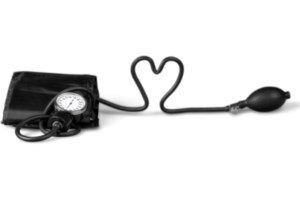
You will find a sphygmomanometer in most households. However, most people don’t know this device by its real name. Commonly known as the blood-pressure monitor, the sphygmomanometer is a device to check your blood pressure.
This device was invented in 1881 by Karl Samuel Ritter von Basch, an Austrian physician. In 1886, Scipione Riva-Rocci developed the machine to make it easier for others to use. Today, this version is now available as the manual sphygmomanometer.
Source: https://www.britannica.com/technology/sphygmomanometer#ref1269232
The word “sphygmomanometer” is of Greek origin. It consists of two words – “sphygmos,” meaning heartbeat, and “manometer,” a device used to measure the pressure levels.
The apparatus of a sphygmomanometer may look complicated. There are too many components, and you may have very little knowledge of using this device.
Therefore, in this article, you will learn about the following –
- Types of sphygmomanometer,
- Parts of a sphygmomanometer, and
- How to use a sphygmomanometer.
All the information mentioned here will help you get acquainted with the device.
Types of Sphygmomanometers
There are mainly two types of Sphygmomanometers – Manual, and Digital. The underlying difference between manual and digital sphygmomanometers is the convenience of use and accuracy.
Let us take a more detailed look at the different types of sphygmomanometers –
1. Manual sphygmomanometers:

Trained medical practitioners usually use manual sphygmomanometers. These devices use a stethoscope for auscultation (a process involving listening to the internal sounds of the body).
Manual sphygmomanometers are of two types – Mercury and Aneroid. Read on to understand the difference between the two!
1. Mercury sphygmomanometer:
-
- This blood pressure monitor is a “gold standard” device amongst other variants.
- Because they’re so accurate, various doctors and other medical practitioners use them in clinical set-ups, such as evaluating high-risk patients and pregnancy.
- Mercury sphygmomanometers are placed upright on a flat surface for an accurate reading.
- These devices do not require recalibration and last up to a lifetime.
- However, these sphygmomanometers are banned in some countries as it contains toxic elements.
- Baumanometer is a type of mercury sphygmomanometer which is wall-mounted.
2. Aneroid sphygmomanometer:
-
- Aneroid sphygmomanometers do not contain any liquid, thus safer than mercury sphygmomanometers.
- They are more common in use.
- However, the inexpensive sphygmomanometers may provide faulty readings.
- This blood pressure monitor requires recalibration, unlike mercury sphygmomanometers.
- There are different types of aneroid sphygmomanometers, such as – pocket-style, palm, and clock-style.
- Wall-mount aneroid sphygmomanometers are not prone to frequent recalibration.
2. Digital sphygmomanometers:

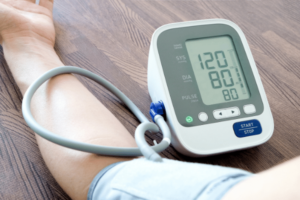
Digital sphygmomanometers (or automatic digital sphygmomanometers) are technologically advanced compared to the two manual sphygmomanometers. Unlike the manual ones, these machines consist of electronic sensors that calculate your blood pressure by studying your artery’s fluctuations.
These sensors detect your systolic and diabolic measures, along with your pulse rate, which is visible on a digital monitor.
The digital variant does not require recalibration compared to the manual blood pressure monitors.
For an accurate reading, you should compare the results on a digital blood pressure monitor with a manual sphygmomanometer used by a trained medical practitioner.
Parts of a Sphygmomanometer
Despite different variants of the sphygmomanometer, there are some parts common to all devices. Let’s take a look at what these components are!
Bladder:
The bladder looks like an inflatable bag. The bladder’s function is to compress the arm to constrict the movement of the artery. Bladders need specific sizes and measurements to ensure the required blockage.
Cuff:
A cuff is a bandage wrapped around the arm. It acts as a support to the bladder. The cuff comes with an in-built pressure meter to gauge the amount of pressure on the arm while monitoring blood pressure levels. A proper design of the cuff will ensure correct positioning. In turn, it will result in more accurate levels of measure.
Manometer:
A manometer measures the air pressure in mmHg (millimeters of mercury). These are usually present in manual sphygmomanometers, especially aneroid sphygmomanometers. A manometer looks like a dial with a clock-like movement to gauge the pressure levels on the cuff.
Valve:
The valve controls the amount of pressure on the cuff. It is one of the critical components that facilitate an accurate reading. The valve also ensures that the air does not escape from the bulb.
Bulb:
It is a small, rubber balloon-like component that allows you to pump air in the cuff.
How to use a sphygmomanometer

Since there are two types of sphygmomanometers, there are slight differences in how they work and the kind of result you obtain upon using them.
However, the way to use either sphygmomanometer is more or less the same.
Before using the sphygmomanometer, wash your hands and arms. Ensure they are not sweaty.
Let’s take a look at the process of using a manual sphygmomanometer –
Step 1 – Positioning the cuff on the arm:
- Wrap the cuff around your arm.
- Ensure that it is placed one inch above the elbow pit (also known as the antecubital fossa).
- The cuff length should be 80% of the arm’s circumference.
- The arm should be at the same level as the heart – whether you’re sitting or lying down.
Step 2 – Using the stethoscope:
- Place the stethoscope bell over the brachial artery located on the upper arm.
- Put minimal pressure on the bell and hold on to it with an equally firm grip.
- Too much pressure will result in hearing higher-pitched sounds instead of wanting to hear lower-pitched sounds.
Step 3 – Inflating the cuff:
After positioning the cuff and the stethoscope bell:
- Place two to three fingers on the elbow pit.
- Use the bulb to inflate the cuff by pumping it.
- Once it reaches a point where you can no longer feel the artery, start releasing slowly.
- Wait for about 30 seconds to a minute before repeating this process.
Step 4 – Finding the blood pressure:
Now you will repeat the same process in Step 3. The only difference is that you will now pump 30 mm Hg higher than the systolic number.
For example, if you got a systolic number of 110, you will now pump the cuff at 140 (110+30) mm Hg.
- After reaching the desired number, use the valve to unscrew the bulb gradually.
- Let it drop at the pace of 2 mmHg per second.
- The first sound you hear is systolic pressure.
- The last sound you hear is diabolic pressure.
For example, if you hear the first sound at 105 mmHg and the last at 75 mmHg, your blood pressure will be 105/75 mmHg (the systolic pressure/diabolic pressure)
Step 5 – Documenting the reading:
- Deflate the cuff entirely.
- Remove it and clean it if it is non-disposable.
- Note down the blood pressure and mention which arm you measured it on.
According to the NHS in the United Kingdom, the regular blood pressure reading ranges from 90/60 mmHg to 120/80 mmHg. Anything above 140/90 mmHg indicates high blood pressure, whereas below 90/60 mmHg is a sign of low blood pressure.
Source: https://www.nhs.uk/common-health-questions/lifestyle/what-is-blood-pressure/
On the other hand, using a digital sphygmomanometer is as easy as it gets. As mentioned in step one, wrap the cuff around your arm and press the start button. You will get your reading in under one minute.
You can repeat this process to cross-check your reading. Most digital sphygmomanometers have an in-built feature where you can check your previous blood pressure.
You May Also Like To Read:
5 Common Blood Pressure Readings Mistakes To Avoid
What Is Ambulatory Blood Pressure Monitoring?
Conclusion
So, there you have it! A beginner’s guide to using a manual and digital sphygmomanometer. If you have purchased a manual machine, you may not understand how to use it in the first go. On the other hand, digital devices are more hassle-free and cost-efficient.
Did you find this article helpful in any way? Share your thoughts and opinions in the comment box below!
If you have tried using the sphygmomanometer, let us know. Please feel free to mention your experience with this machine, along with some dos and don’ts for first-timers and recommendations on which sphygmomanometer to purchase!


